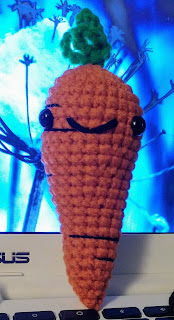
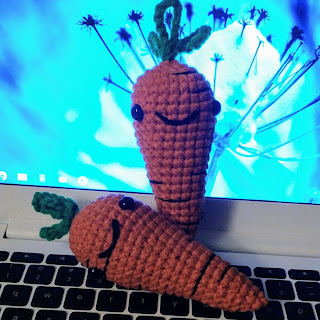
Cute Garden Amigurumi Bowl - Carrots
Our spring onions need a friend... lets introduce them to carrots!
Supplies
Worsted Weight Yarn in orange and green - I used Fair Isle Yarn Liberty in Tangerine and Grass
4.5mm crochet hook
Poly Fil stuffing
Safety Eyes - I used 10mm
Darning or Yarn needle
stitch marker
Abbreviations
SC = Single Crochet
CH = Chain
INC = Increase
DEC = Decrease
F/O = Finish Off
SL ST = Slip Stitch
Carrot
Leaves
Round 1: CH 3 and SL ST to join
Round 2: CH 10 and SL ST into same stitch, CH 12 in next stitch and SL ST into same stitch, CH 8 in next stitch and SL ST into same stitch and F/O leaving tail to sew to top of carrot later.
Carrot
Round 1: 6 SC in MR (6) - tighten down and sew in end after Round 2
Round 2: INC in each around (12)
Round 3: SC then INC and repeat around (18)
Round 4: 2 SC then INC and repeat around (24)
Sew leaves to top of carrot in the 6 SC ring of the first Round. Leave yarn end inside of head as extra stuffing.
Rounds 5-9: SC around (24)
Add safety eyes between Rounds 7 and 8 with 6 stitches showing between them.
Add stuffing to top of carrot.
Round 10: 6 SC then DEC and repeat around (21)
Rounds 11-12: SC around (21)
Round 13: 5 SC then DEC and repeat around (18)
Rounds 14-15: SC around (18)
Round 16: 4 SC then DEC and repeat around (15)
Rounds 17-18: SC around (15)
Round 19: 3 SC then DEC and repeat around (12)
Rounds 20-21: SC around (12)
Add stuffing to fill in the rest of the carrot.
Round 22: 2 SC then DEC and repeat around (9)
Round 23: SC around (9)
Round 24: SC then DEC and repeat around (6)
Round 25: SC then DEC and repeat again (4)
Add a tiny bit of stuffing to fill in the end and then sew closed by looping the needle through the outside loop of each of the last 4 stitches, then draw tightly closed and sew in your end.
I added a face to my carrot. I also added a few thin lines around his body using black crochet thread, just for some detail.
Make as many as you like... you can make them longer or shorter by adjusting the number of rows you use in each section after a DEC Round.
Now there are 2... :D See you tomorrow for more!


Comments
Post a Comment