Crochet Lined Dragon Egg Bag - Free INTERMEDIATE Pattern
Hey there... I'm totally jazzed to share this bag, some super fun tips and tricks and some sneak peeks with you today! :D
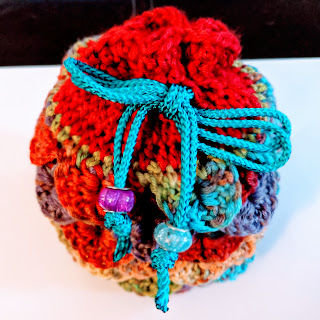
lets get started... check out this super cute little dragon egg bag... combining a fully crocheted lining that is part of the whole bag and fun crocodile stitch scales laid over the top so that it's "one piece" construction from the bottom to the top!
 Some really awesome features include a one piece construction that allows you to line the bag at the same time you make it, so that it's a perfect sundries bag, dice bag or change purse because nothing jumps out between scales! You can change the size of hook and yarn and make a shoulder bag (pictured below) or a mini bag just the right size for a few dice on your way to gaming!


So... The pattern... :D

CH = Chain
HDC = Half Double Crochet
DC = Double Crochet
FLO = Front Loop Only - A crochet stitch is a V from the top, this means working in the front loop of the V only
BLO = Back Loop Only - A crochet stitch is a V from the top, this means working in the back loop of the V only
SL ST = Slip Stitch
INC = Increase - Work 2 of the same stitch in the space of 1 to increase stitch count around
SK = Skip indicated number of stitches
F/O = Finish Off… trim your yarn, sew in your ends.
(#) = Round stitch count EX: (40) means there should be forty stitches in the Round


 FIRST FOUNDATION ROUND: You are working in the FLO left behind in Round 7 of the Lining. I begin 1 loop to the right of where the Round joined. This join DOES NOT count as a stitch, you must still SK 2 after you form the first V. CH 4, this counts as your first DC in the V stitch and CH 1 then DC in the same loop. CH 2, SK 2 and DC in the next. CH 2 and then DC, CH 1 and DC in the next. Continue this pattern around the bag alternating DC post and DC V stitch combination with SK 2 between each to the end. SL ST to join in the 3rd CH from the bottom in your first V Stitch.


or bags made with a yarn that likes to curl. This is one of the "tricks"
in the paid PDF version of the pattern in my Etsy shop.

The super cute bubblegum ball stitch marker is thanks to FrontPocketStudio who makes really wonderful stitch markers, jewelry, tins and charms using her own original hand-drawn designs on shrink plastic and resin and beads and glitters! She can be found on Facebook and Instagram.
The darling little charms on the pyramid bags are from Adorabilities who makes many charms of just about every type and jewelry and also sells parts, kits and other fun things. I buy a lot of charms from her because I just love and adore them ALL. All I had to do was pop some rings and lobster clasps on them and they were ready to become zipper pulls!
lets get started... check out this super cute little dragon egg bag... combining a fully crocheted lining that is part of the whole bag and fun crocodile stitch scales laid over the top so that it's "one piece" construction from the bottom to the top!


this little bag was made altering the pattern below and using a 3.5mm hook
and fingering weight sock yarn. Once you master the pattern, there's really
almost no limits on the size and style of bag you make from it!

For a full color detailed PDF pattern that includes adjustments and additional elements
to turn this little cutie into a shoulder or cross-body bag, please head on over to my
Etsy shop after April 26 to purchase it. Code TAKE10 gives you 10% off purchases over $10!
So... The pattern... :D

This bag was made using only about 1/3 of each of these skeins.
NOTE: Willow Guppie and Premier Garden yarns are the same fiber, same manufacturer
and come from the same supplier in the same colorways. Guppie comes in solids
that coordinate with the prints sold in both brands. I love the fiber because it's soft
and doesn't stretch, felt or pill, so it makes perfect little bags that will be in other bags.
SUPPLIES:
Worsted weight or aran weight yarn - approx 220 yards
4.5mm crochet hook
Locking Stitch Marker
Scissors
Yarn or darning needle with large enough hole for your yarn weight
Drawstring cord - I used rattail satin knotted after I’d fed them through the loops on the bag. You’re seeing a little under a yard here because it was doubled over.
OPTIONAL: Beads for the ends of your drawstring cord.
Needle and thread: if you’re using rattail or other fraying cord, I suggest that you stitch through and secure your ends, even if you are knotting the cord. It just provides a little extra security against fraying. I burned the ends of the one shown.
ABBREVIATIONS:
MR = Magic RingCH = Chain
HDC = Half Double Crochet
DC = Double Crochet
FLO = Front Loop Only - A crochet stitch is a V from the top, this means working in the front loop of the V only
BLO = Back Loop Only - A crochet stitch is a V from the top, this means working in the back loop of the V only
SL ST = Slip Stitch
INC = Increase - Work 2 of the same stitch in the space of 1 to increase stitch count around
SK = Skip indicated number of stitches
F/O = Finish Off… trim your yarn, sew in your ends.
(#) = Round stitch count EX: (40) means there should be forty stitches in the Round
NOTES:
- At the start of each Round in the body of the bag you will CH 1 after the SL ST and then make the first stitch of that Round. The CH does not count as a stitch and should not be counted in the Round count.
- Note the difference when instructions say IN the stitch or BETWEEN the stitches… when working IN the stitch you will place your hook through both (or only FLO or BLO if instructed) of the parts of the stitch from the Round before just as you would do in regular crochet. When working BETWEEN the stitches you are working your stitch between the posts of the stitches in the Round before. See photos below.
- By having 2 stitch markers you can mark your place AND also use a stitch block when you have to set your work aside and come back. By placing a stitch marker through the loop of your current stitch it will block or stop your work from tearing out.
- This bag only seems complicated when written. You are building the bottom, and then the liner and then the outside of the bag. When the scales are finished you are joining the lining to the scale layer and finishing the top of the bag. This way the whole bag is lined, your pieces are crocheted together instead of having to be sewn, and you have literally made the bag all in one. Even if we know it was really more like all in 2.

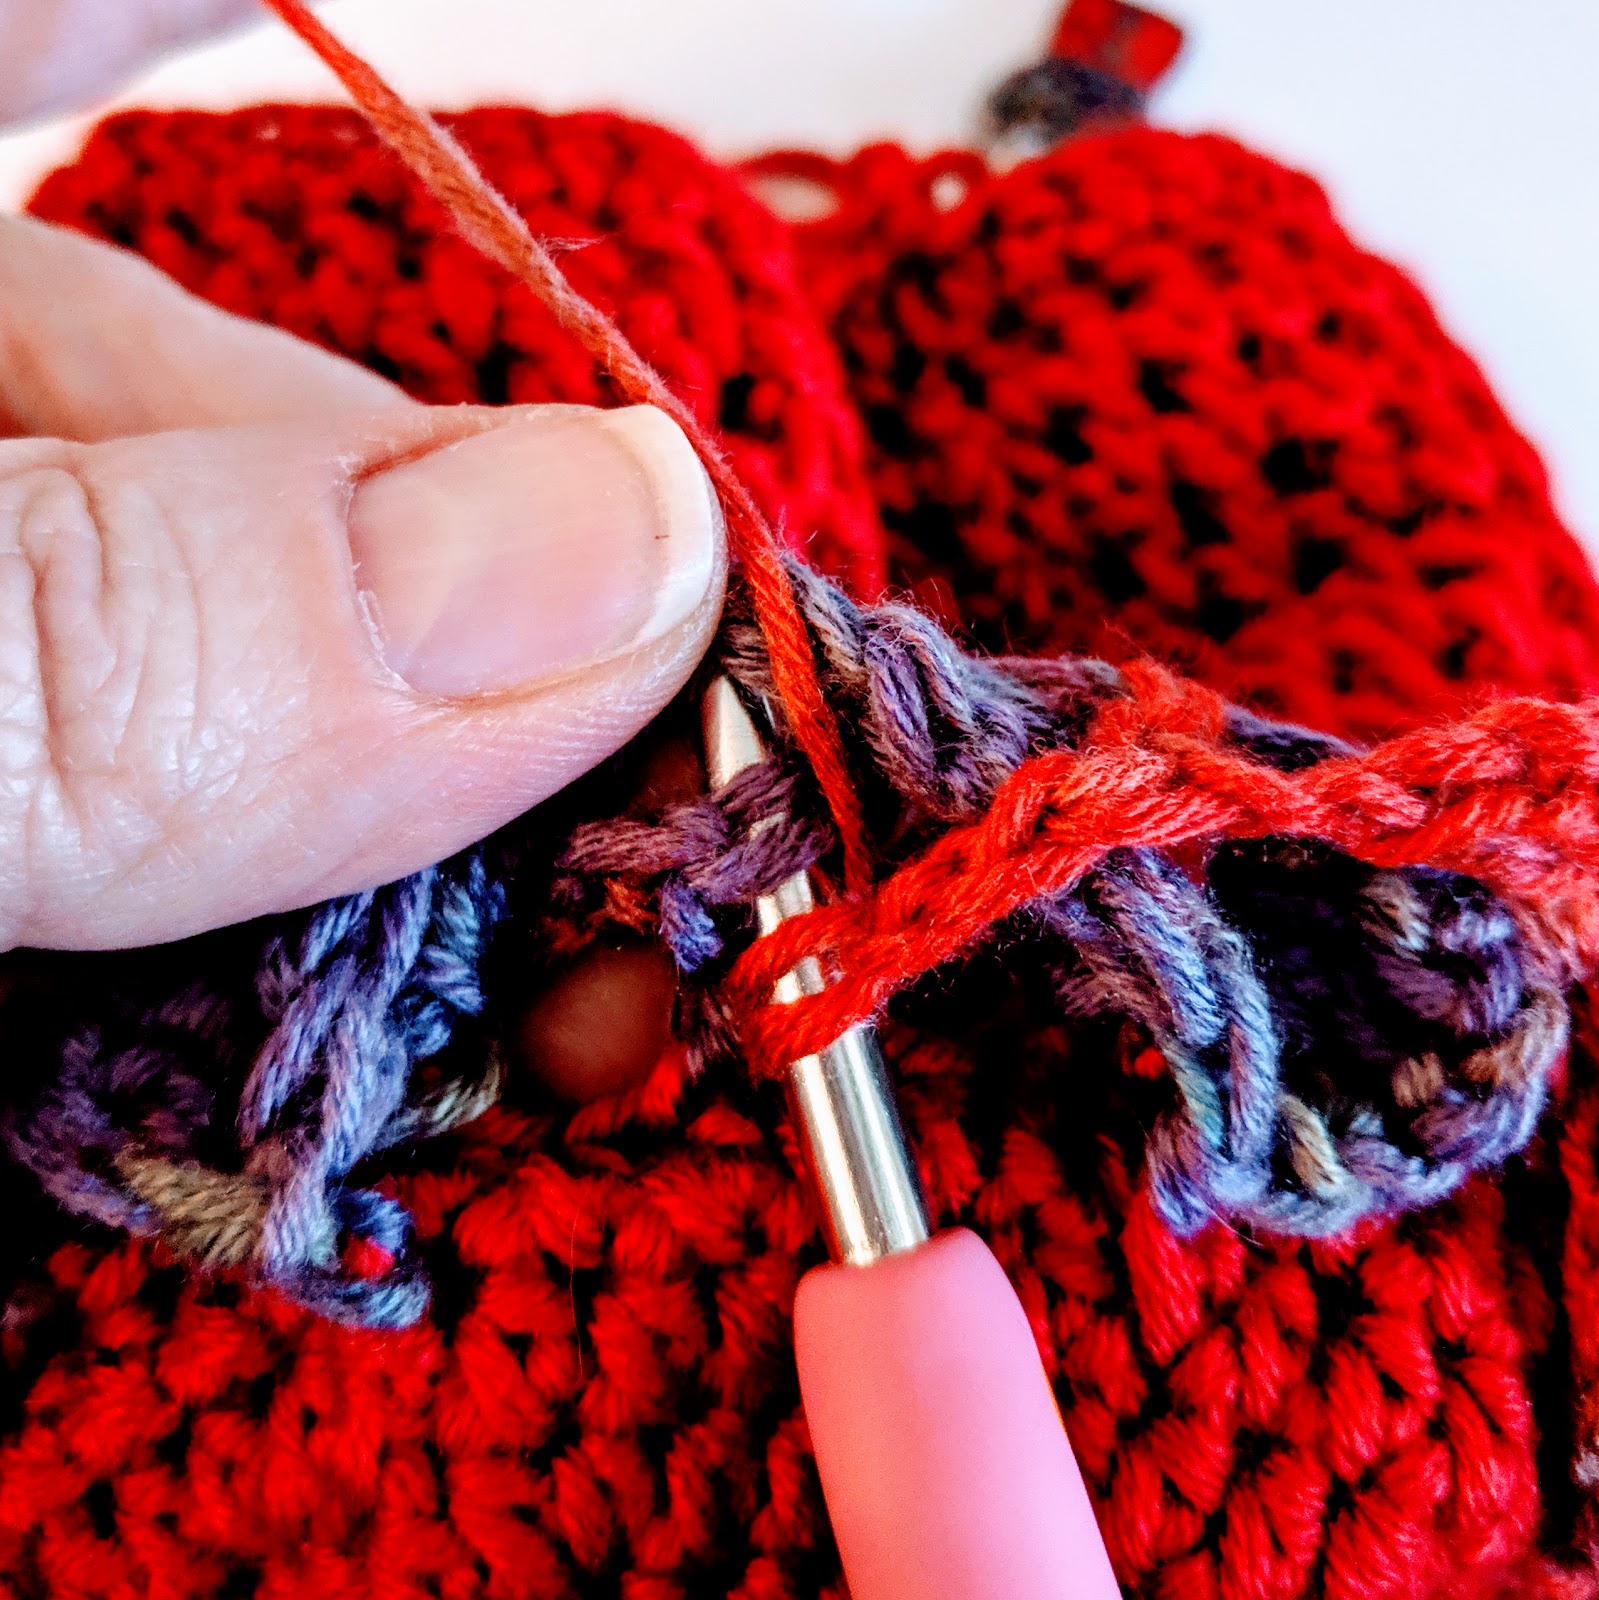
a "pro tip" for you.
When I'm working on this bag I tend to keep the layers separated by working the scales dropped "down" or laying like you see above. This helps prevent accidentally attaching the scales to
the lining, and also helps because I "tilt" my work left and right as I work on the
individual scales 7 times around each Round. :D
Dragon Egg Bag
BOTTOM
Round 1: Work 10 HDC in MR (10) SL ST to top of first stitch in the Round and CH 1- Work first stitch of next Round in same space as CH 1. CH 1 never counts as a stitch. You will repeat this throughout the bottom and lining and top parts of the bag. Draw MR closed and sew in your ends after Round 2
Round 2: INC in each stitch around (20) SL ST and CH 1
Round 3: HDC then INC and repeat around (30) ST ST to join and CH 1
Round 4: 2 HDC then INC and repeat around (40) SL ST to join and CH 1
Round 5: 19 HDC then INC and repeat again (42) SL ST to join and CH 1
Round 6: HDC around (42) SL ST to join and CH 1

Work the Round...

SL ST to join and CH 1

1st (or both if you're INC in this stitch) stitch in same space as CH 1

BLO leaves the Front Loops waiting to attach the Dragon Scale layer.
BODY LINING
Round 7: BLO DC in each stitch around (42) SL ST to join and CH 1


a crochet stitch is V on the top, BLO means work in the back part of that V only

which leaves a loop at the front that will be your FLO Round later.
Rounds 8-16: DC between the stitches all the way around. (42) SL ST to join and CH 1.
(This should be 10 Rounds of DC, if it’s easier for you to count them that way.)
between the stitches, or posts instead of through the top of the stitch

leaves you this pattern for the Body or Liner layer
Round 17: HDC in each stitch around. (42) SL ST to join.
in each stitch for Round 17, returning to crocheting through the top or "both loops"
of the stitch as with usual crochet patterns

and SL ST to join and add a stitch marker through the loop to hold the stitch
NOTE: If you are using a different yarn for your scales you can leave this end attached, just put a stitch marker through the loop of your stitch to keep it from unraveling. If you are continuing with the same yarn then cut and F/O your end now and mark this as the start point when we are joining the bag together.
DRAGON SCALES
- You are working in the remaining FLO from Round 7 for the first Round of the bag.
- Join in your yarn and tie in and secure it through the back side of the Scale Round once it is complete. DO NOT SECURE THE DRAGON SCALES PART OF THE BAG THROUGH THE BODY.
- You will work alternating FOUNDATION and SCALE Rounds repeating after the FIRST FOUNDATION and SCALES Rounds are done. These repeating Rounds are called FOUNDATION and SCALE and will be repeated after the first time they are done.
- This part of the pattern is worked in multiples of 6. The FIRST FOUNDATION is the only place where this will matter, well… unless you want to make your own pattern and change the size of the bag. Then it’s important to know that you’re working in multiples of 6.


View is up from bottom of the bag. Note the SK 2 between each attached
stitch or cluster on the bag...
You should have a total of 7 V’s in this Round with a single DC post standing between each one.
FIRST SCALE ROUND: CH 3, this is the first DC in your first Scale on every Round of the bag. Work 4 more DC around the post of this side of the V stitch, tilt your work slightly and work 5 DC around the other post of the V stitch. DO NOT CHAIN BETWEEN SCALES. Work 5 DC around the 1st post of the next V stitch to the left around the bag, tilt your work slightly and work 5 DC around the other post of the V stitch. Continue this pattern until you've created all 7 scales on this Round. UNLESS YOU ARE CHANGING COLOR, DO NOT CUT YOUR YARN.
NOTE: When I say I am rotating my work slightly as I work...

tilted slightly left for the first side of the scale

tilted slightly right for the second side of the scale.

it will lay down once you've gone around and shape them with your fingers

there's no space or stitch between the last DC on one scale and the first DC on the next
insert hook here to "join" the scales and end the Round

you're going to insert your hook into the end CH on your first scale, then down
through the top of the post between the last and first scales then
yarn over and come back through
and SL ST.
From here the pattern will repeat these two Rounds until you have repeated 7 times
(to match 10 Rounds of DC on the BODY LINING because the scales are taller than DC)
- PLEASE NOTE: the DC stretches outward more than the SCALES and the SCALES are taller.
- PLEASE ALSO NOTE: You may not realize that the SCALE Rounds are stepping ½ a stitch to the RIGHT every Round because of the way that the SCALES are being formed. This will not affect color changes and will mean that your final stitch in the SCALES part of the bag will not match the location of the stitch marker in your BODY LINING portion. This is fine. Begin from the spot on the SCALES Round where you ended every FOUNDATION Round.
FOUNDATION ROUNDS
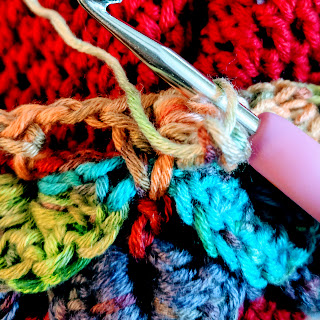
CH 4 (this counts as your DC and CH 1) and DC in the same space. CH 2. DC in the space in the middle of the scale from the previous round. CH 2. DC and CH 1 and DC all in the top of the post of the single DC from the Round before making sure to go around the joined ends of the DC making up the space between scales from the round before. (see photos) Repeat this around to the beginning. You should end on a CH 2 and then SL ST into the 3rd CH of your CH 4 that started the Round.

this is the CH 4, DC that forms the V stitch to start the Foundation Round

CH 2, DC, CH 2 drops into the center of the Scale from the previous Round

Post and connected DC between Scales
Through the top of the Post, around the connected DC between Scales
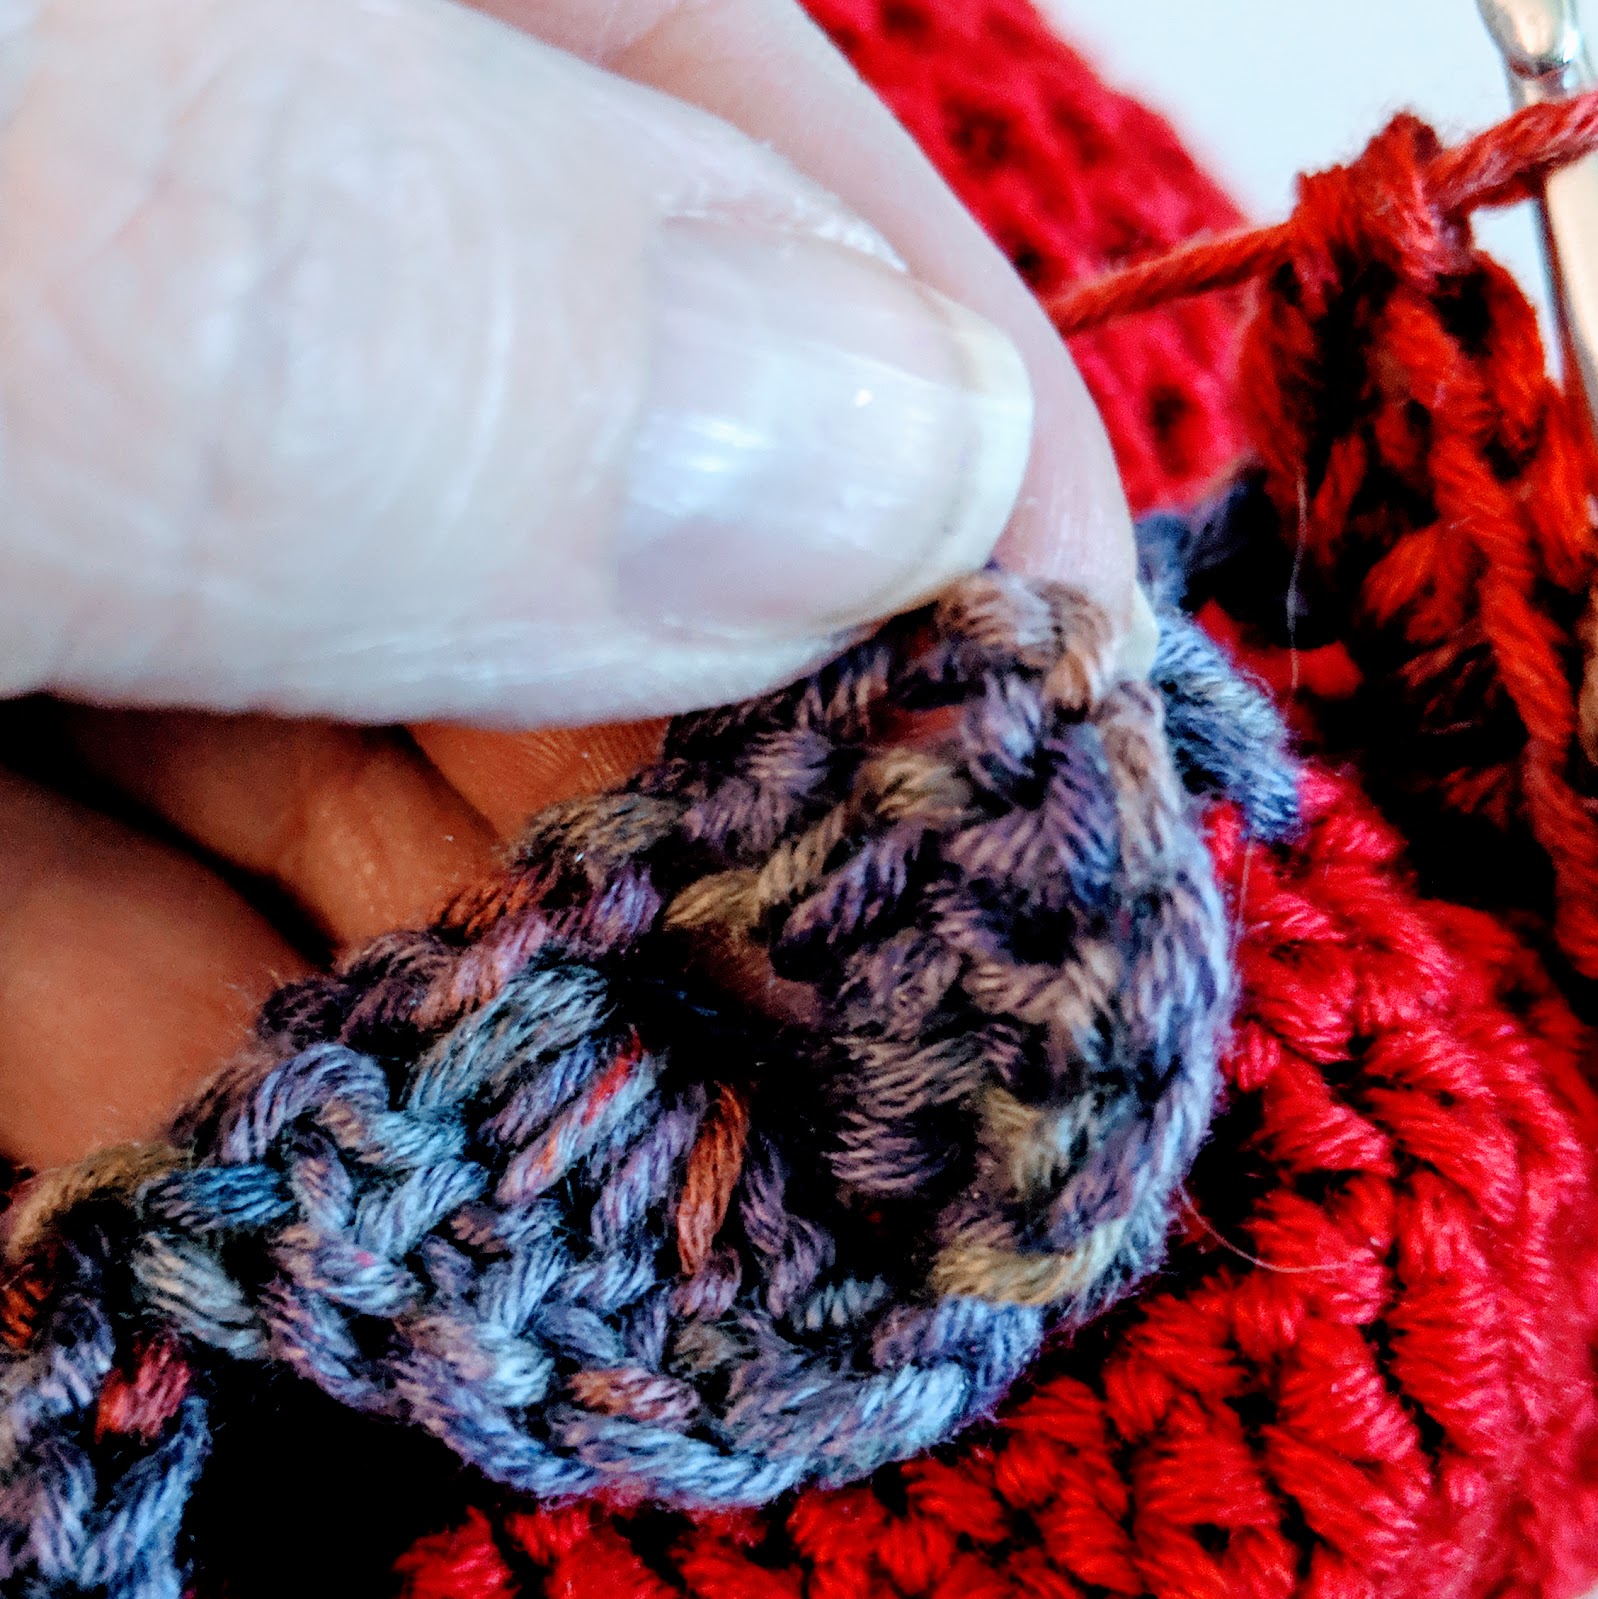
(to see how and why you can tell the bottom of this scale is attached to the bag
please go to the bottom of the pattern... it's an adjustment to the pattern)

secures the connected Scales down and ties the structure for the next scale TO the post

SL ST to join and then begin the Scale Round with a CH 3
SCALE ROUNDS
FIRST SCALE ON EACH ROUND: (you've just joined from the Foundation Round) CH 3 then work 4 DC around the closest post of the V, then tilt your work and make the remaining 5 DC around the other side of the V post.
Continue around your Foundation Round Work 5 DC around the closest post of the V to your LEFT. Rotate your work slightly and work 5 DC around the other post of this V stitch. Repeat this around to the beginning. SL ST through the 3rd CH that started your first Scale AND through the top of the post between scales in the Foundation Round. (see photo above from First Scale Round)
Continue around your Foundation Round Work 5 DC around the closest post of the V to your LEFT. Rotate your work slightly and work 5 DC around the other post of this V stitch. Repeat this around to the beginning. SL ST through the 3rd CH that started your first Scale AND through the top of the post between scales in the Foundation Round. (see photo above from First Scale Round)
You will now repeat FOUNDATION then SCALE until you have completed a total of 10 Rounds. Remember that FIRST FOUNDATION and FIRST SCALE Rounds count as 1 Round together and 1/7 total.
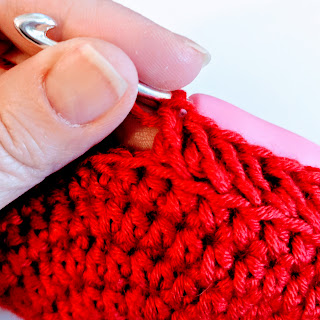
FINAL ROUND: HDC around the whole bag as shown in photo below and in the Joining Body Lining and Dragon Scale Layers in the next section. What is important is that you end with 42 HDC just like you started with. Trust me, it will all match up and be ok on the next Round, follow the photos. F/O and sew in your end.

I'm placing my HDC in the top as evenly as I can.
Note, also... you can see my hand through the stitches. THIS is why we're lining the bag!
JOINING BODY LINING AND DRAGON SCALE LAYERS
I line up the parts of my bag as closely as I can (see photo below) and then choose a spot to begin.

I double check my alignment by stretching my bag around my hands and turning
until the stitches are lining up closely in both layers.
Using your crochet hook enter the stitch on the DRAGON SCALE layer and bring the loop from your BODY LINING layer through to the front. SL ST to secure, CH 1 and then HDC in the same space.


Crochet through the top of the stitch in the DRAGON SCALE layer as well as
the top of the stitch in the BODY LINING layer.
Round 1: HDC through both layers around (42) SL ST to join and CH 1
Round 2: HDC in each stitch around (42) SL ST to join and CH 1
Round 3: DC then CH 1 and SK 1 and repeat around (21) SL ST to join and CH 1 This is your drawstring Round.
Round 4: HDC in the top of the posts from the previous Round and through the CH 1 space between the posts in the previous Round.
Round 5: HDC in each stitch around (42) SL ST to join and F/O. Sew in your end.

CH 3 or DC + CH 1 and SK 1 and then DC + CH 1 and continue around and SL ST to join.

HDC in the top of a post

HDC in the CH 1 space between posts. This brings the bag back into shape.
WEAVING IN YOUR DRAWSTRING

pretty simple. I pick a place "at the front" of the bag and begin weaving my cord
through up and down. I have found satin-ish ribbon or rat-tail cord works best,
nylon and leather cord also work nice. Anything that is smoother than the yarn.

big beads at the ends are just pretty.
and when drawn tight you can slip your arms through these loops and wear the bag
as a wristlet, which is always nice. I also have tied bags like this TO the strap on a bigger bag.
Doin' it "old school" pouch style. :D

silly cute, super colorful and a perfect useful gift

a lot can fit in a tiny little egg... :D

a dragon... or just all the stuff I need. :D
That's a wallet, smokes, gum, chapstick, lighter and flash light.
What more could any girl really need?
PATTERN ADJUSTMENT

note the post from the previous Round.
you can work 5 DC on the first part of the V stitch, SC through part of the post
below and then continue working the remaining 5 DC on the other post of the V stitch
and "tack" your scales down on each Round. I do this occasionally on bigger bagsor bags made with a yarn that likes to curl. This is one of the "tricks"
in the paid PDF version of the pattern in my Etsy shop.

single crochet here then continue DC around other post.
Please make, sell and gift anything you like from my patterns. Just please also give me credit for writing them. :D Please do not share the text of this message or any PDF purchased from my store. I make my living writing patterns and I work really hard to make sure you get the benefit of free stuff because you're awesome and following me here or on Instagram. Please direct your friends and family to my shop or here to the blog (or even my Ravelry page which also has all of my free pattern links) rather than copying and pasting the pattern. :D thanks... I really do appreciate you! Tons and lots!
And remember to tag me @ and #
12SquaredCreations on Instagram.
12SquaredCreations on Instagram.
I LOVE to see what you do!
some peeks at other bags made with this pattern...
sort of a sneaky peek at the pattern available on Etsy


annnnd... coming soon... mini pyramid bags!
a perfect change purse or sundries bag... the sort of thing you need all the time


 a totally sweet make your own project as
a gift for the holidays or for any day!
some peeks at other bags made with this pattern...
sort of a sneaky peek at the pattern available on Etsy


annnnd... coming soon... mini pyramid bags!
a perfect change purse or sundries bag... the sort of thing you need all the time


a gift for the holidays or for any day!
The super cute bubblegum ball stitch marker is thanks to FrontPocketStudio who makes really wonderful stitch markers, jewelry, tins and charms using her own original hand-drawn designs on shrink plastic and resin and beads and glitters! She can be found on Facebook and Instagram.
The darling little charms on the pyramid bags are from Adorabilities who makes many charms of just about every type and jewelry and also sells parts, kits and other fun things. I buy a lot of charms from her because I just love and adore them ALL. All I had to do was pop some rings and lobster clasps on them and they were ready to become zipper pulls!

Comments
Post a Comment