mini pyramid bag... FREE BEGINNER CROCHET PATTERN
I found a really fun crochet purse pattern out on YouTube by this incredible lady named Sophia. The channel is Paraligo and her story behind the name makes me adore her even more! Here is the link to her Crochet Clutch Pyramid Bag. My own pattern here is based losely on her pattern and I want you all to know right up front that this in no way lessens her pattern or generosity or the awesomeness of her video tutorial.
 I jumped from her ideas into my own world and made a less sewing (you do know that I hate sewing in every form) version that's also mini... :D I really hope you love this incredibly simple little thing as much as I do! If you paint numbers on the side it's a perfect D4 dice bag, too... just saying.
Now... please note... a larger version of the bag and some tips and tricks will be for sale in my Etsy shop coming up soon as a full color PDF pattern. This little mini is my gift to you because you follow me here and on Instagram and I adore you for it!


 Supplies
approx. 80 yards of worsted weight cotton or cotton blend yarn
4" zipper
5mm crochet hook
darning needle or yarn needle
scissors
straight pins or safety pins
locking stitch marker
OPTIONAL: a purse charm made or you can make one (or use a stitch marker on a lobster clasp, I did that for a friend's bag the other day because I knew she loved the marker. :D )
The carabiner I used here is round and was purchased at Amazon here. Joann's sells fun shaped carabiner's here and Michael's sells them here.
A smaller ball of Premier Home Cotton found here is more than enough yarn to make at least 2 of these cute little pyramids. I'll be honest... I find it best to watch for sales or hit up Joann's or Herrschners online for sales because often they're cheaper than going to Premier direct. For instance, at the time of writing this post Premier is selling these at $1.89 each, Herrschners is .10c cheaper and Joann's has them at $1.10. :D Coupons and sales can sometimes make them even cheaper.
Finding cute little stitch markers can be a challenge if you don't want to pay a lot. I make my own by adding a ring and a lobster clasp to charms that I bought from Adorabilities on Etsy here. She has so many really fun selections and collections that it's as fun to shop there as it is to make the little bags! And the best part is that she's done the hard part of collecting all the pieces and turning them into high quality charms, you only have to add a ring and clasp! Also, I do make and sell my own stitch markers and purse charms, so you're always welcome to check out my Etsy shop here and find out if there are currently any listed. Or message me and see what's coming soon.
Abbreviations
CH = Chain
SC = Single Crochet
SL ST = Slip Stitch
F/O = Finish Off
Some notes and tips...
Pyramid Change Purse or Key Ring Fob
the bag
Round 1: CH the width of your 4" zipper - for me this is 18 + 1 as a turning chain. Beginning from the 2nd CH from your hook SC back along the back hump or bottom of the stitches to the end... (18) now rotate the CH and SC back along the other side of the CH through the top loops of the crochet stitches all the way back (18)


 Leave a long tail at the end. CH 16, working back along the chain in the back hump or bottom of the stitch beginning from the 2nd stitch from the hook SC (15) CH 1 and do not cut your yarn.
 Fold your loop in half. Insert your hook through the top of the last SC you just made and also into the top of the very first SC that you made, and SC once. Insert your hook into the bottom edge of the last SC you made and through the edge of the CH where your other tail is and make a SC. Now CH 1 and cut your yarn leaving a long tail.
 It might look wonky and it will work for securing it to the top of the pyramid bag.

 By zipping the bag closed and folding a line from the top point to each end of your original seam you will begin to see the pyramid take form.
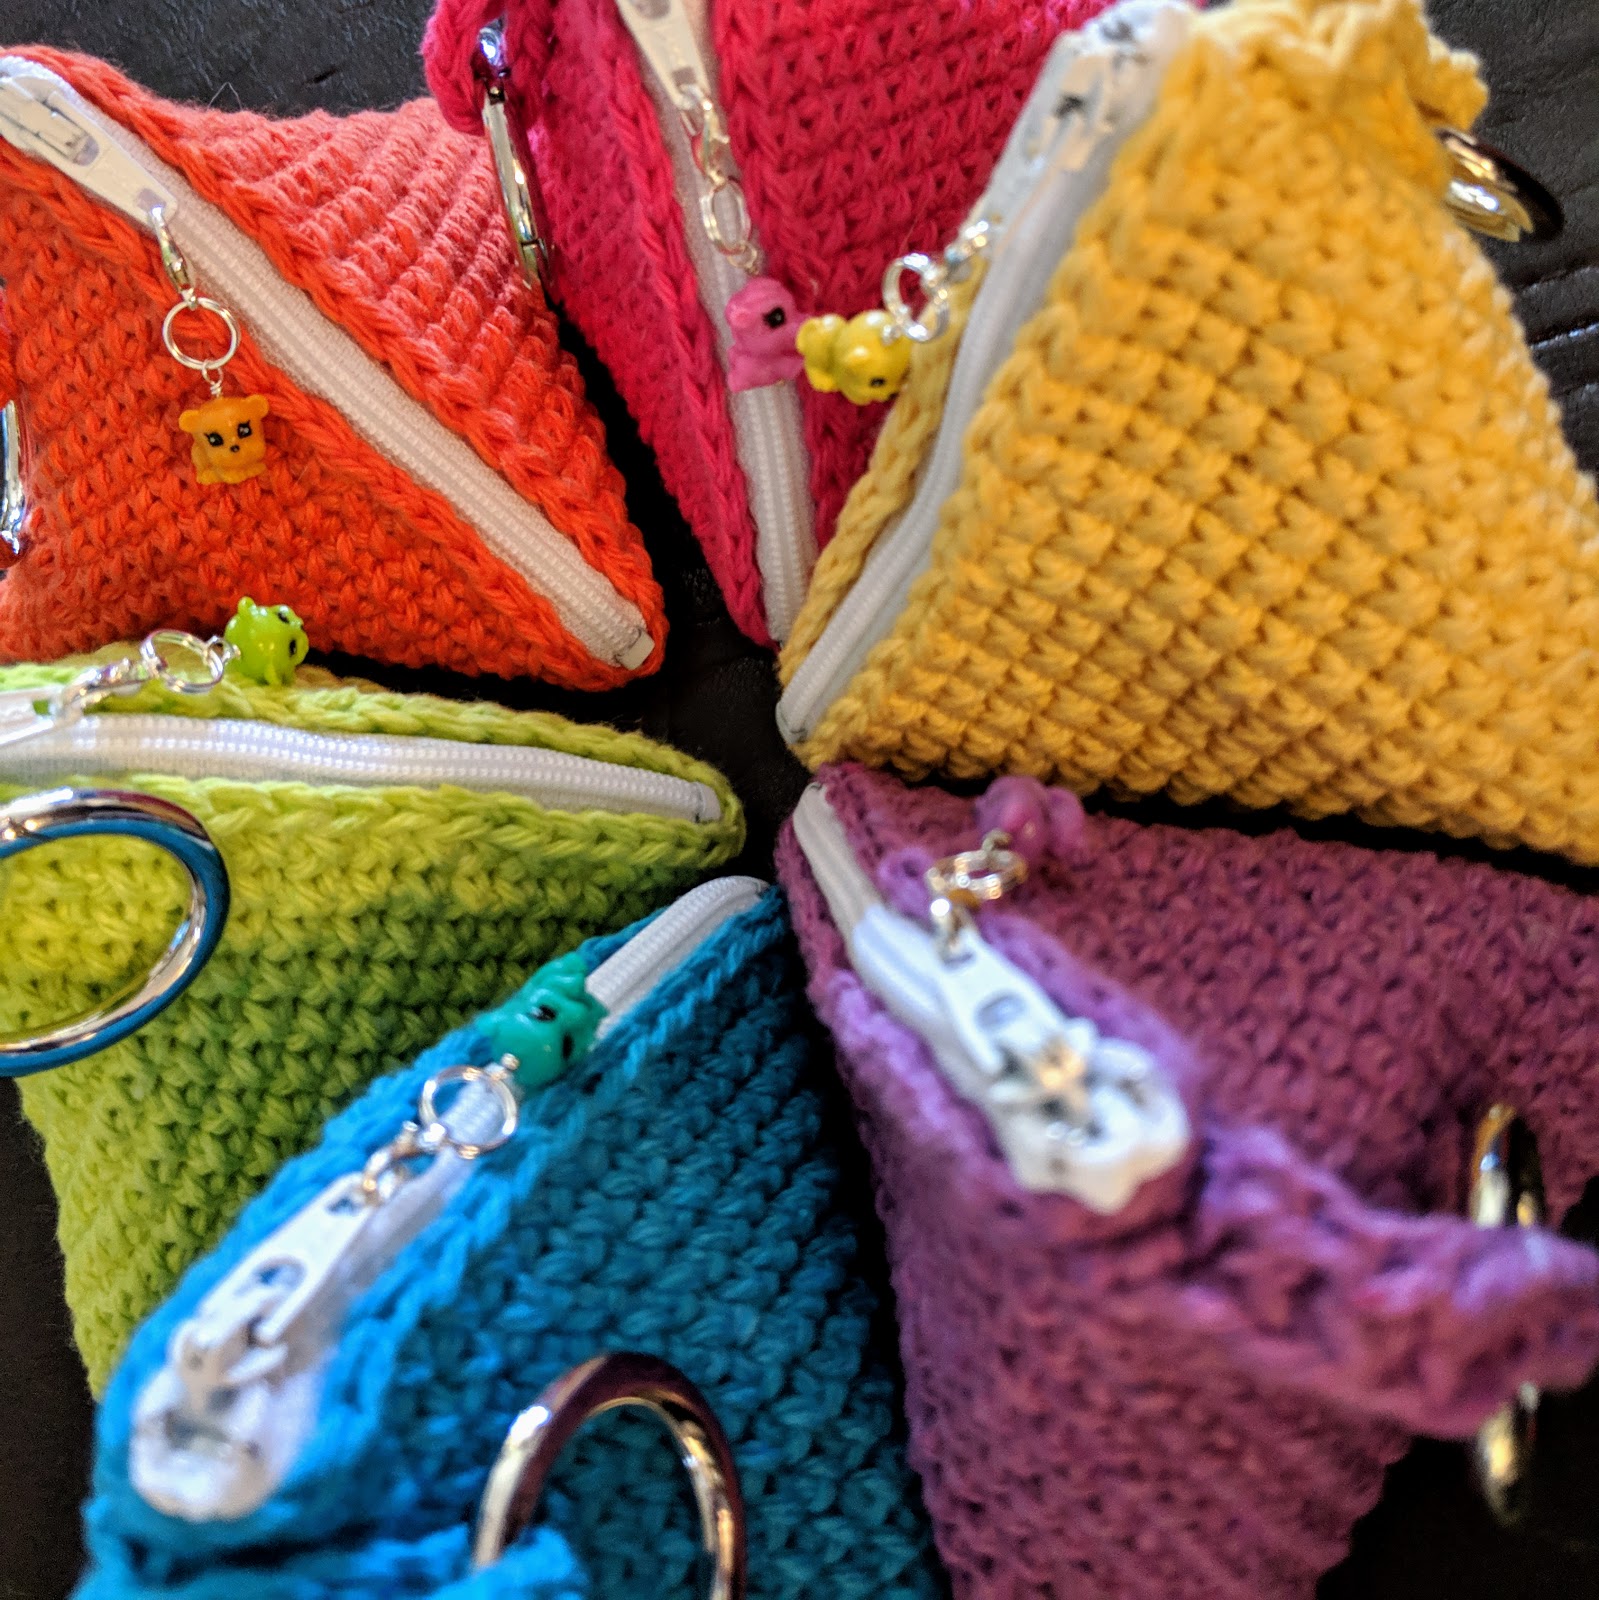
 You can see why I love adding a little zipper pull... it just adds a little character to a fabulous little bag. These bears from Ida Herter are some of my most favorite of her charms!
 Zipper forms the upright of the + sign we imagined earlier, and your original seam (remember, that super hard thing that you did first thing in the pattern? :D ) forms the cross bar when you look at the bag this way.
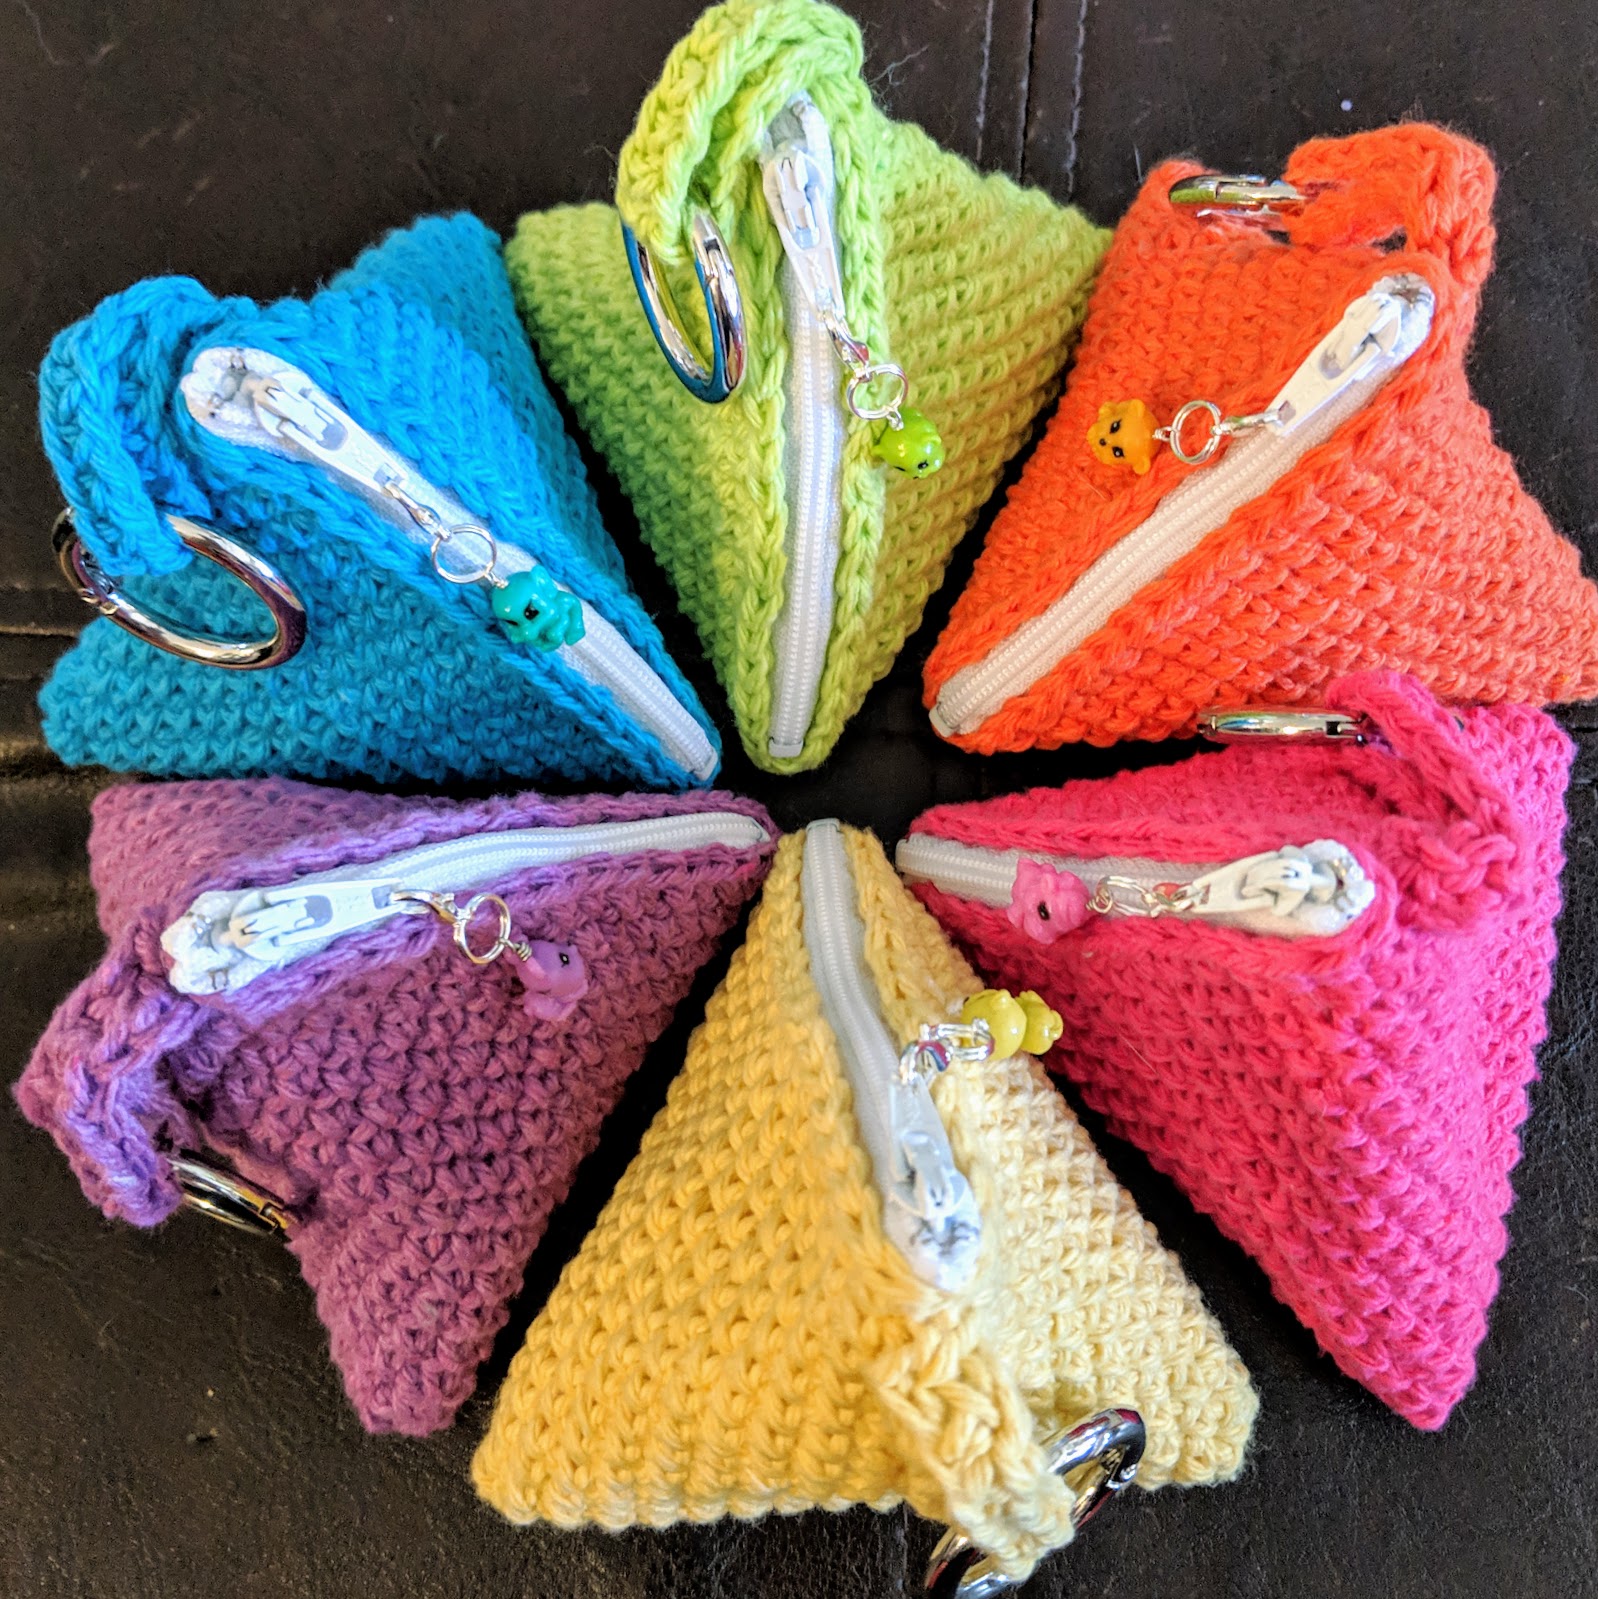
 And now that you've done it, you can do it over and over and over again! :D Super fast, super easy and look at how it just sort of magically becomes a triangle THING!

The super cute fish bulb stitch marker you see in this pattern was bought here from KarensHobbyRoom. She has tons of awesome sets, if you don't want to make your own... or just have a love for collecting stitch markers like I do. LOL In getting this link for you I just saw some new sheeps I'll have to have. :D
All 6 of these cute little bags are for sale in my Etsy shop now while supplies last. I no longer make large quantities of stuff to sell, and so when these are gone they're gone.
Now... please note... a larger version of the bag and some tips and tricks will be for sale in my Etsy shop coming up soon as a full color PDF pattern. This little mini is my gift to you because you follow me here and on Instagram and I adore you for it!


approx. 80 yards of worsted weight cotton or cotton blend yarn
4" zipper
5mm crochet hook
darning needle or yarn needle
scissors
straight pins or safety pins
locking stitch marker
OPTIONAL: a purse charm made or you can make one (or use a stitch marker on a lobster clasp, I did that for a friend's bag the other day because I knew she loved the marker. :D )
The carabiner I used here is round and was purchased at Amazon here. Joann's sells fun shaped carabiner's here and Michael's sells them here.
A smaller ball of Premier Home Cotton found here is more than enough yarn to make at least 2 of these cute little pyramids. I'll be honest... I find it best to watch for sales or hit up Joann's or Herrschners online for sales because often they're cheaper than going to Premier direct. For instance, at the time of writing this post Premier is selling these at $1.89 each, Herrschners is .10c cheaper and Joann's has them at $1.10. :D Coupons and sales can sometimes make them even cheaper.
Finding cute little stitch markers can be a challenge if you don't want to pay a lot. I make my own by adding a ring and a lobster clasp to charms that I bought from Adorabilities on Etsy here. She has so many really fun selections and collections that it's as fun to shop there as it is to make the little bags! And the best part is that she's done the hard part of collecting all the pieces and turning them into high quality charms, you only have to add a ring and clasp! Also, I do make and sell my own stitch markers and purse charms, so you're always welcome to check out my Etsy shop here and find out if there are currently any listed. Or message me and see what's coming soon.
Abbreviations
CH = Chain
SC = Single Crochet
SL ST = Slip Stitch
F/O = Finish Off
Some notes and tips...
- You honestly can use ANY yarn and ANY hook for this... the trick is in making your CH as long as the zipper + a little bit, as you will see in my first photo below. I have made these bags from worsted weight acrylic, worsted weight cotton, DK weight blend and sock yarn. Yeah, you read that right... sock yarn.
- This is such a forgiving pattern that you really can use this as a beginner level pattern... the hardest bit is explained clearly and happens right at the beginning of the pattern. By the time you're on Round 2 you've already finished the hardest part! :D
Pyramid Change Purse or Key Ring Fob
the bag
NOTE: ok, so this is the hardest part... and it's done really fast... so let's do it
and then we can both be super proud of you that you got it done so quickly and gorgeously!
Round 1: CH the width of your 4" zipper - for me this is 18 + 1 as a turning chain. Beginning from the 2nd CH from your hook SC back along the back hump or bottom of the stitches to the end... (18) now rotate the CH and SC back along the other side of the CH through the top loops of the crochet stitches all the way back (18)

18 (or your number for a similar fit) + 1 turning CH

TOP of CH is V's like a braid...

BOTTOM of CH is dashes or humps...

2nd CH from your hook... BOTTOM or hump part of the stitch

SC in each stitch to the end (18 or whatever your final number was)

this is the other side of the stitch, the TOP or braid looking side

I tug the tail and "knot" behind my hook and insert through the tops of the stitch
and yarn over and make my SC then sort of straighten the end a little
with my fingers because it wants to sit out there at the top

now you can see how you're working the "other side" of the CH

when you make the 18th (or whatever your final count was) stitch on this side
then place a stitch marker in it. This marks completion of Round 1
And you're a rock star! You just did the absolute hardest part of the whole thing! :D It's cake from here. No, really... you'll see.
NOTE: You are working in the round, so you will not be doing any SL ST or other
finishes, just continuing to work around and around. My Round stitch count is 36 and
my pattern will list this as a number, if yours was slightly different because your yarn,
tension or hook is different, write it down on a note pad. You wont have a hard time
remembering it, though. LOL It's the only number you need from here on out.
Rounds 2-16: SC in each stitch around (36) At the end of Round 16 SL ST and F/O and sew in your end as invisibly as you can. This edge will be against the zipper and at the front of the bag. :D

Round 2 first SC is in this spot here

and from here you just keep going around and around.
NOTE: I move my stitch marker to the last stitch in the 5th Round,
and again to the last stitch in the 10th Round just so that I have
fewer Rounds to count back along.

I just moved the marker up to last stitch of 5th Round
Assembly
This is tricky, not hard... and once you've done it once it wont even be tricky.
NOTE: Think how a kid draws a house... trust me, you'll understand.
The Zipper
Laying the bag out flat, place your hand inside and open it the opposite directions of the seam on the bottom, so that you're opening it like an envelope. From the outside of the bag line up your bottom center Round of the bag, and lay the points together so that when you fold the bag it looks like the 4th photo below.
NOTE: The closed bottom and the top seam where you are attaching the zipper
form a virtual or just visual + sign when you do it right.

the bottom of your bag forms a meeting V row like this

finished bag with ends sewn in

folded so that the center line with the meeting V's lines up

like children draw houses. :D
Line up your zipper once you have folded the bag and pin it in place using the straight pins you have so that the top of the zipper is at one end and the bottom of the zipper is at the other end.

I use the pins just to make sure I'm lined up right.

I begin by stitching and tying in my thread at the right side, and prefer to start the
zipper here, too. I start with it closed. You will see I open it later.

I stitch under through the zipper and back up again. I try to "tack" down one side
of each V of the stitch face by coming up between stitches and going down in the
middle of the next stitch. The thread isn't totally hidden, and it's hidden enough.

At the end I loop around the zipper above the stop if the zipper is too long and will
be tucked into the bag, and after it if the zipper is the right length. After passing
through to the other side of the zipper I turn the bag and begin to work back up.

Showing you how I pass through to the other side of the zipper.
(not shown) this is also where I unzip the zipper to have room inside of the bag.

I sew in the ends of the zipper a little bit when I get to that end so that
the ends stay tucked inside the bag.
The Strap


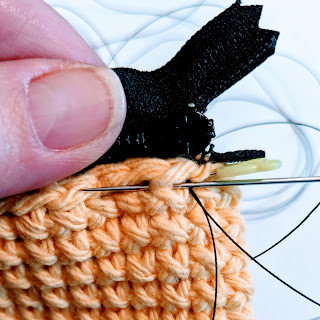
Centered over the open ends of the zipper (where it will be when the zipper is closed) at the top of the pyramid sew in the strap and tie off and sew in your ends on the INSIDE of the pyramid bag.


All 6 of these cute little bags are for sale in my Etsy shop now while supplies last. I no longer make large quantities of stuff to sell, and so when these are gone they're gone.
Please make, sell and gift anything you like from my patterns. Just please also give me credit for writing them. :D Please do not share the text of this message or any PDF purchased from my store. I make my living writing patterns and I work really hard to make sure you get the benefit of free stuff because you're awesome and following me here or on Instagram. Please direct your friends and family to my shop or here to the blog (or even my Ravelry page which also has all of my free pattern links) rather than copying and pasting the pattern. :D thanks... I really do appreciate you! Tons and lots!
And remember to tag me @ and # 12SquaredCreations
on Instagram.
on Instagram.
I LOVE to see what you do!
Comments
Post a Comment