BOO! 6 Days of Halloween Mini's Just In Time! SKULLS!!!
Six days of free mini patterns including all of the critters in the picture below plus some! A total of like 12 patterns... :D Not including your adjustments or inspirations, of course!
 Yes, you read right... that's GHOSTS, BATS, OWLS, SKULLS and FLOWERS, PUMPKINS and LEAVES, CANDY CORN and WITCHES HATS, and as always... free when posted here on the 12SquaredCreations blog.
These dolls and many others are listed for sale in my Etsy shop... or you can use these free patterns to make your own.
I designed these patterns to demonstrate the versatility of a single shape with minor changes or simple decorations... All of these dolls begin with a simple ball shape and come out very differently based on what you do with them. The closest to the original shape are the bat and pumpkin, and the farthest is a tie between the ghost and the skull.
Every day this week I will be posting free patterns, ending today with this awesome versatile skull that just needs decorations! I have included some eye sockets, flowers and a simple butterfly... and really, the sky is the limit here... go crazy!


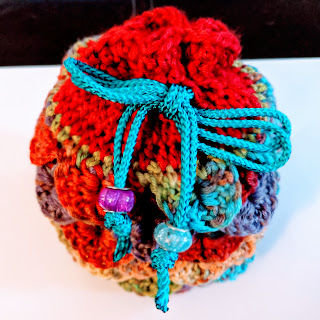
Supplies
Worsted weight yarns in the colors you need - I used Fair Isle Yarn Liberty in Cloud and Black and a number of other Liberty colors. Actual colors listed with patterns.
**Update: This year I used Herrschner's Worsted 8 Halloween Shimmer in colors listed with the patterns.
4.5mm crochet hook
darning or yarn needle
scissors
12 mm buttons or safety eyes
stitch marker or contrasting yarn to use as a stitch marker
polyfill or other stuffing. mine is always mixed with the yarn cuttings from previous projects
Abbreviations
MR = Magic Ring
SC = Single Crochet
HDC = Half Double Crochet
DC = Double Crochet
CH = Chain
FLO = Front Loop Only
BLO = Back Loop Only
SL ST = Slip Stitch
C/C = Change Color
DEC = Decrease
INC = Increase
F/O = Finish Off
Notes
You are working in the round, using a stitch marker will really help.
Make all of your parts before you begin because you will be adding them before the skull is finished.
If you are using buttons or a flower for an eye you do not need to make a socket for that eye.
I have found 3 roses or one of each of the other flowers is sufficient decoration for these cute little faces.
These little dolls are addictive, be prepared to go wild with color changes and inspiration... and please, show me what you come up with on the Facebook group or tag me at 12SquaredCreations on Instagram so I can see what you made!


**Update: Herrshners Worsted 8 Halloween Shimmer in Ghost and Batty with additional colors for flowers and leaves
Round 1: 6 SC in MR(6) - pull tight and sew in your end after Round 2
Round 2: INC in each around (12)
Round 3: SC and INC and repeat around (18)
Round 4: 2 SC and INC and repeat around (24)
Round 5: 3 SC and INC and repeat around (30)
Round 6: 4 SC and INC and repeat around (36)
Rounds 7-11: SC around (36)
Round 12: 4 SC and DEC and repeat around (30)
Round 13: SC around (30)
Round 14: 3 SC and DEC and repeat around (24)
Round 15: 2 SC and DEC and repeat around (18)
Rounds 16-18: SC around (18)
Sew on your Eye socket or flowers or both... and stuff the head and cheeks of the skull as tightly as you can without exposing the stuffing through the stitches.
Round 19: BLO SC and DEC and repeat around (12)
Add a little bit more stuffing and work your decreases in the last round carefully not to pull fiberfill up onto the stitches.
Round 20: DEC in each around (6)
Sew closed using FLO of your remaining 6 stitches and pull tight. Sew in your end and bury strings in the body.
I stitched my mouth and nose slits on in black yarn after stuffing the skull. Then I attached my butterfly where I wanted it.
Eye Sockets
Round 1: 6 SC in MR (6)
Round 2: You are working an INC in each stitch so I separated using commas because the stitches change as you go around. INC in each around, SC, HDC, HDC, HDC, HDC, SC in each around (12) the SC point is at the bottom of the eye socket.
F/O and sew in ends.
I attached my sockets by whip stitching around in a contrasting color and making my stitches messy... if you're looking for a less traditional icing appearance you can leave a long tail on the socket and stitch it carefully into place around the circumference using the same color of yarn.
Marigold
I started with Fair Isle Liberty in custard and then changed to tangerine
**Update: I started with Herrschners Worsted 8 in Jack-o-Lantern and changed to Full Moon.
Round 1: 6 SC in MR
Round 2a: FLO SC CH 6 SL ST in each stitch around - F/O and sew in end.
Round 2b: C/C BLO SC CH 6 SL ST CH 6 SC in each stitch around - F/O and leave long tail for securing to the skull.
I used my tail in the contrasting color to sew my button down in the center of the eye.
Rose
Row 1: CH 26 and work your way back along the CH beginning with the 2nd stitch from the hook. SC, HDC, DC, DC, HDC and repeat to the end. F/O and knot your thread well, leave a very long tail for stitching flower and securing it to the skull.
Spiral the rose from the center and secure with whip stitches every so often until it forms a lovely circle like the pictures shown.


Round Flower
Round 1: 12 SC in MR - pull tight and sew in ends after Rounds 2a and b.
Round 2a: FLO SC and CH 1 in each around and SL ST into top of 1st SC. F/O and tie in end.
Round 2b: C/C BLO start second color and CH 1 (counts as first SC) work in pairs of stitches around: 1st stitch SC, HDC, DC. 2nd stitch DC, HDC, SL ST and repeat around until you have 6 petals. F/O after last SL ST and leave a long tail for securing it to the skull
I used my tail to stitch down a button in the center of the flower.


Butterfly
Round 1: Work all in a MR: CH 3, 3 DC, SL ST, CH 1, 2 HDC, 2 SC, 2 HDC, CH 1, SL ST, 3 DC, CH 3, SL ST into MR and tighten center tail and then F/O outer stitches with long tail for wrapping butterfly body and securing to the skull.
Wrap the tail around the center of your butterfly 5 or 6 times to form the body and then stitch in place and knot securely.


I utilized stitching to make my leaves because I wanted the flowers and butterflies to be the true stars of the show... you can use the leaf pattern from the pumpkin pattern if you like and want to make your skulls really bold.
I used a simple loop of yarn as a hanger for my skulls to turn them into ornaments. You can also use wire or a jump ring. This part is entirely up to you.

These dolls and many others are listed for sale in my Etsy shop... or you can use these free patterns to make your own.
I designed these patterns to demonstrate the versatility of a single shape with minor changes or simple decorations... All of these dolls begin with a simple ball shape and come out very differently based on what you do with them. The closest to the original shape are the bat and pumpkin, and the farthest is a tie between the ghost and the skull.
Every day this week I will be posting free patterns, ending today with this awesome versatile skull that just needs decorations! I have included some eye sockets, flowers and a simple butterfly... and really, the sky is the limit here... go crazy!


Supplies
Worsted weight yarns in the colors you need - I used Fair Isle Yarn Liberty in Cloud and Black and a number of other Liberty colors. Actual colors listed with patterns.
**Update: This year I used Herrschner's Worsted 8 Halloween Shimmer in colors listed with the patterns.
4.5mm crochet hook
darning or yarn needle
scissors
12 mm buttons or safety eyes
stitch marker or contrasting yarn to use as a stitch marker
polyfill or other stuffing. mine is always mixed with the yarn cuttings from previous projects
Abbreviations
MR = Magic Ring
SC = Single Crochet
HDC = Half Double Crochet
DC = Double Crochet
CH = Chain
FLO = Front Loop Only
BLO = Back Loop Only
SL ST = Slip Stitch
C/C = Change Color
DEC = Decrease
INC = Increase
F/O = Finish Off
Notes
You are working in the round, using a stitch marker will really help.
Make all of your parts before you begin because you will be adding them before the skull is finished.
If you are using buttons or a flower for an eye you do not need to make a socket for that eye.
I have found 3 roses or one of each of the other flowers is sufficient decoration for these cute little faces.
These little dolls are addictive, be prepared to go wild with color changes and inspiration... and please, show me what you come up with on the Facebook group or tag me at 12SquaredCreations on Instagram so I can see what you made!


Skulls
I used Fair Isle Liberty yarn in cloud and black and then TONS of colors for flowers and leaves**Update: Herrshners Worsted 8 Halloween Shimmer in Ghost and Batty with additional colors for flowers and leaves
Round 1: 6 SC in MR(6) - pull tight and sew in your end after Round 2
Round 2: INC in each around (12)
Round 3: SC and INC and repeat around (18)
Round 4: 2 SC and INC and repeat around (24)
Round 5: 3 SC and INC and repeat around (30)
Round 6: 4 SC and INC and repeat around (36)
Rounds 7-11: SC around (36)
Round 12: 4 SC and DEC and repeat around (30)
Round 13: SC around (30)
Round 14: 3 SC and DEC and repeat around (24)
Round 15: 2 SC and DEC and repeat around (18)
Rounds 16-18: SC around (18)
Sew on your Eye socket or flowers or both... and stuff the head and cheeks of the skull as tightly as you can without exposing the stuffing through the stitches.
Round 19: BLO SC and DEC and repeat around (12)
Add a little bit more stuffing and work your decreases in the last round carefully not to pull fiberfill up onto the stitches.
Round 20: DEC in each around (6)
Sew closed using FLO of your remaining 6 stitches and pull tight. Sew in your end and bury strings in the body.
I stitched my mouth and nose slits on in black yarn after stuffing the skull. Then I attached my butterfly where I wanted it.
Eye Sockets
Round 1: 6 SC in MR (6)
Round 2: You are working an INC in each stitch so I separated using commas because the stitches change as you go around. INC in each around, SC, HDC, HDC, HDC, HDC, SC in each around (12) the SC point is at the bottom of the eye socket.
F/O and sew in ends.
I attached my sockets by whip stitching around in a contrasting color and making my stitches messy... if you're looking for a less traditional icing appearance you can leave a long tail on the socket and stitch it carefully into place around the circumference using the same color of yarn.
Marigold
I started with Fair Isle Liberty in custard and then changed to tangerine
**Update: I started with Herrschners Worsted 8 in Jack-o-Lantern and changed to Full Moon.
Round 1: 6 SC in MR
Round 2a: FLO SC CH 6 SL ST in each stitch around - F/O and sew in end.
Round 2b: C/C BLO SC CH 6 SL ST CH 6 SC in each stitch around - F/O and leave long tail for securing to the skull.
I used my tail in the contrasting color to sew my button down in the center of the eye.
Rose
Row 1: CH 26 and work your way back along the CH beginning with the 2nd stitch from the hook. SC, HDC, DC, DC, HDC and repeat to the end. F/O and knot your thread well, leave a very long tail for stitching flower and securing it to the skull.
Spiral the rose from the center and secure with whip stitches every so often until it forms a lovely circle like the pictures shown.

doesn't look like much here

begin to coil

stitch through backs of stitches only and pull tight as you coil

always from center outward so that the loops pull the flower flat


a pretty little flower
Round Flower
Round 1: 12 SC in MR - pull tight and sew in ends after Rounds 2a and b.
Round 2a: FLO SC and CH 1 in each around and SL ST into top of 1st SC. F/O and tie in end.
Round 2b: C/C BLO start second color and CH 1 (counts as first SC) work in pairs of stitches around: 1st stitch SC, HDC, DC. 2nd stitch DC, HDC, SL ST and repeat around until you have 6 petals. F/O after last SL ST and leave a long tail for securing it to the skull
I used my tail to stitch down a button in the center of the flower.

back loops only... 2 stitches per petal

Butterfly
Round 1: Work all in a MR: CH 3, 3 DC, SL ST, CH 1, 2 HDC, 2 SC, 2 HDC, CH 1, SL ST, 3 DC, CH 3, SL ST into MR and tighten center tail and then F/O outer stitches with long tail for wrapping butterfly body and securing to the skull.
Wrap the tail around the center of your butterfly 5 or 6 times to form the body and then stitch in place and knot securely.

before and after wrapping the body into the middle

I utilized stitching to make my leaves because I wanted the flowers and butterflies to be the true stars of the show... you can use the leaf pattern from the pumpkin pattern if you like and want to make your skulls really bold.
I used a simple loop of yarn as a hanger for my skulls to turn them into ornaments. You can also use wire or a jump ring. This part is entirely up to you.
Go crazy and remember to share your results with me and tag me on Instagram!
Have a spooktacular Halloween and a festive and commemorative Day of the Dead!!

Thanks so much for sharing your patterns! Can't wait to make some skulls!
ReplyDelete