12SquaredCreations Patreon November #2 - Twinchie Ornaments
This series is my gift to all of you. Inspiration and some instruction for gifts you can make and include in a standard envelope to a friend, penpal or family member. Something that doesn't have to wait for the holidays and doesn't have to be about holiday gifting at all. I love sending surprises in the mail that didn't cost me an arm and a leg or tons of time and effort and that still say, "You are special and you matter to me."
For the Patreon group: I have also included some bits and pieces for you that are not pictured in this post. This is about turning the cute little things we all swap into fun uniquely lovely ornaments that mail flat (or reasonably flat) without all the glitz and glamour of the ones I sent to you! LOL
Many of these ideas can be combined. I'll try to remember each time to list the other projects that can combine with each one, and if you happen to see something I missed or didn't think of, please message me at 12SquaredCreations and let me know - tag me if you make it so I can see! I love seeing all the amazing ways everyone else thinks of things, or makes the things I offer up as ideas.
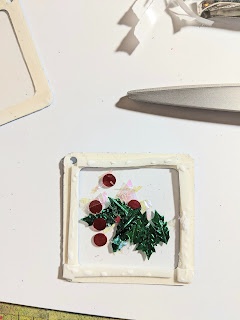
I think what I love most about these is how stinkin' cute, small and customizable they are. I mean, it's a 2" x 2" commitment you're making here. Can't get TOO wordy here, can't cram so much on that it's an inch thick (I mean, I guess you COULD but WHY?) and you can make 36 (yep, you read that right THIRTY SIX) out of a single 12x12 piece of scrapbook paper... so the skies are AGAIN your only limit! Paint up and collage up a whole sheet of fun holiday paper (or packaging, I know I keep saying it and OMG there are so many pieces of pretty light weight paper that we're going to ALL have ALL OVER THE HOUSE because of holiday ordering... they work! Use them!) then cut it down into 2" x 2" squares and punch a hole, put in a hanger and then see where your creativity takes you for decoration.
Fancy Twinchie Ornaments
first... WTF is this, Ruth? A Twinchie is the big brother of the Inchie... in art swap groups often artists will decorate 1" square or 2" square pieces of paper and swap them. Twinchies are 2 inches square. Inchies... you guessed it! 1 inch square. I chose 2 because it's hard to punch a hole in a 1 inch square and not lose something. LOL
ok... you will need:
- paper - umm... more specificity creates limits you really don't have here. Are you painting? Watercoloring? Collaging? Sewing? Will you add this layer TO a backing when it's done or is it going to go "as is" after creation?
- the ability to measure 2" x 2" squares AND cut them
- a hole punch or awl or sharp stick or pencil/pen and soft surface to use under it to poke a hole?
- I used grommets, you do not have to do this. LMAO I'm a little extra.
- String, yarn, embroidery floss, thread, wire, baker's twine, bent paperclips, last year's ornament hook things that come 100 to a box for like $2... anything to use as a hanger. I like string/floss because it's lighter and mails better.
- any and all art supplies you plan on using - no, really. you're in charge here.


Comments
Post a Comment