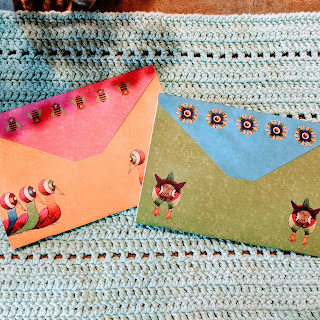
12SquaredCreations Patreon December #2 - Greeting Card Notebook
This series is my gift to all of you. Inspiration and some instruction for gifts you can make and include in a standard envelope to a friend, penpal or family member. Something that doesn't have to wait for the holidays and doesn't have to be about holiday gifting at all. I love sending surprises in the mail that didn't cost me an arm and a leg or tons of time and effort and that still say, "You are special and you matter to me."
For the Patreon group: I've sent you each your own notebook as well as parts to craft one to send to someone else. This post should give you instruction but also some inspiration. I bet you have cards you look at and never use... perhaps with some pages tucked inside they could become something magnificently fun to send to a special pal or family member? A note letting them know you want them to remember that they matter even when following a shopping list or checking off a to-do list is a thing that makes a person feel special even when you're not there to say it yourself. :D
Greeting Card Notebook
SUPPLIES: you will need a greeting card with an envelope, a needle, thread, 5-10 sheets of standard letter or notebook paper or other paper that you prefer to include (some of you have tons of junk journal supplies and this is a great time to use them as appropriate) and whatever decorations you'd like for the front of your card, if necessary.
ok... this is a case of measure twice cut once... you're using your own greeting cards and paper... and notebooks, even ones with very few pages (remember you're MAILING this, you don't wanna have to go non-machinable AND over-weight for postage accidentally) naturally get wider towards the inside.
Recommended measurements: measure your greeting card while open and subtract 1/4 of an inch (or one centimeter if you're joining me from the other side of the pond) from the WIDTH. Measure very slightly less for the height if you care about such things, I don't so I make my paper the same height. I recommend you do not use more than 6 pages because folded in half this is 12 pages, and provides your friend or family member with 24 writing surfaces, and in my experience this mails as standard mail, non-machinable if you used a heavier weight writing or stationery paper because it wont flex at all so can't be machine sorted.
Fold everything in half so that your paper settles neatly into the greeting card.
Thread your needle with thread long enough to stitch AND tie, longer than you think and not so insane that you're tangling and making a disaster for yourself. I do not mark or use a template for this. I estimate the locations of three holes leaving at least 3/4 of an inch at the top and bottom of the card.
NOTE: YOU HAVE A DECISION TO MAKE... do you want your threads inside or outside? I do NOT decorate them with beads or anything because they're being mailed and ideally being carried in my friend's purse or wallet. THE BENEFIT OF OUTSIDE: you can tie a bow and knot it in place and it's pretty. THE BENEFIT OF INSIDE: the ends are tucked away or can be left long enough to be used as a little page keeper/bookmark.
I'm showing you sewing from the inside to the outside. I eyeball the "middle" and push the needle through the valley of the stacked papers and greeting card out through the outside "spine", trapping a few inches of "tail" on the inside with my thumb.
Then I choose left or right and eyeball the space at least 3/4" from the edge, pierce in from the peak side of the spine and papers into the middle of the card again.
Hold the tail that's on the inside out of the way and sew back down through the middle hole from the valley side out to the spine again and this time out to the other end of the card and repeat what you did before, piercing from the peak of the spine and papers to the middle of the card again.
Gently and firmly tighten your threads so that there's not a lot of play and then tie the pieces in the middle in a knot.
I actually use the needle and take my ends under the loop created when I did the first part of my binding stitch so that the knots have something to get tension against. I double knot in the middle.
Beware, these are damned addicting. Why? Because you now use this just like a regular greeting card. You write your message inside what is now the back cover. You tell this person what you wanted to communicate with your card. And encourage them to use this as a notebook or journal or whatever you've made it to be or they choose to use it for. And every time they pick it up your message is a reminder to them that you care, that you were supporting them, that you think they're excellent, that you've fallen in love with them... whatever it is that you wrote.
FROM AUNTIE STEPHANIE: I would use this for my holiday shopping and then keep addresses of people who send me cards for next year. I could even put a list of what I got and who to send thank-you notes to. This is a fun idea. I could use it for all of the holiday and then keep it for my journal!
If you make these please tag me at 12SquaredCreations on Instagram because I love seeing what you do and because I've never known anyone else who makes and sends these, even though I've done it for years. :D Lets make these awesome and unique things a new trend!


Comments
Post a Comment